Creating a Document from a Template in Ketl
Key Benefits :
- Speed: Skip repetitive typing by pulling directly from client records.
- Consistency: Maintain standardized document formatting.
- Accuracy: Reduce typos and errors by using verified stored data.
Exemples de modèles:
- Procuration client: Download
- Courrier de transmission de procuration: Download
- Demande à autorité: Download
Step-by-Step Instructions
Start from the Ketl Home Page
1On the left-hand side panel, click the blue "Plus" sign.

Choose to Create a Document
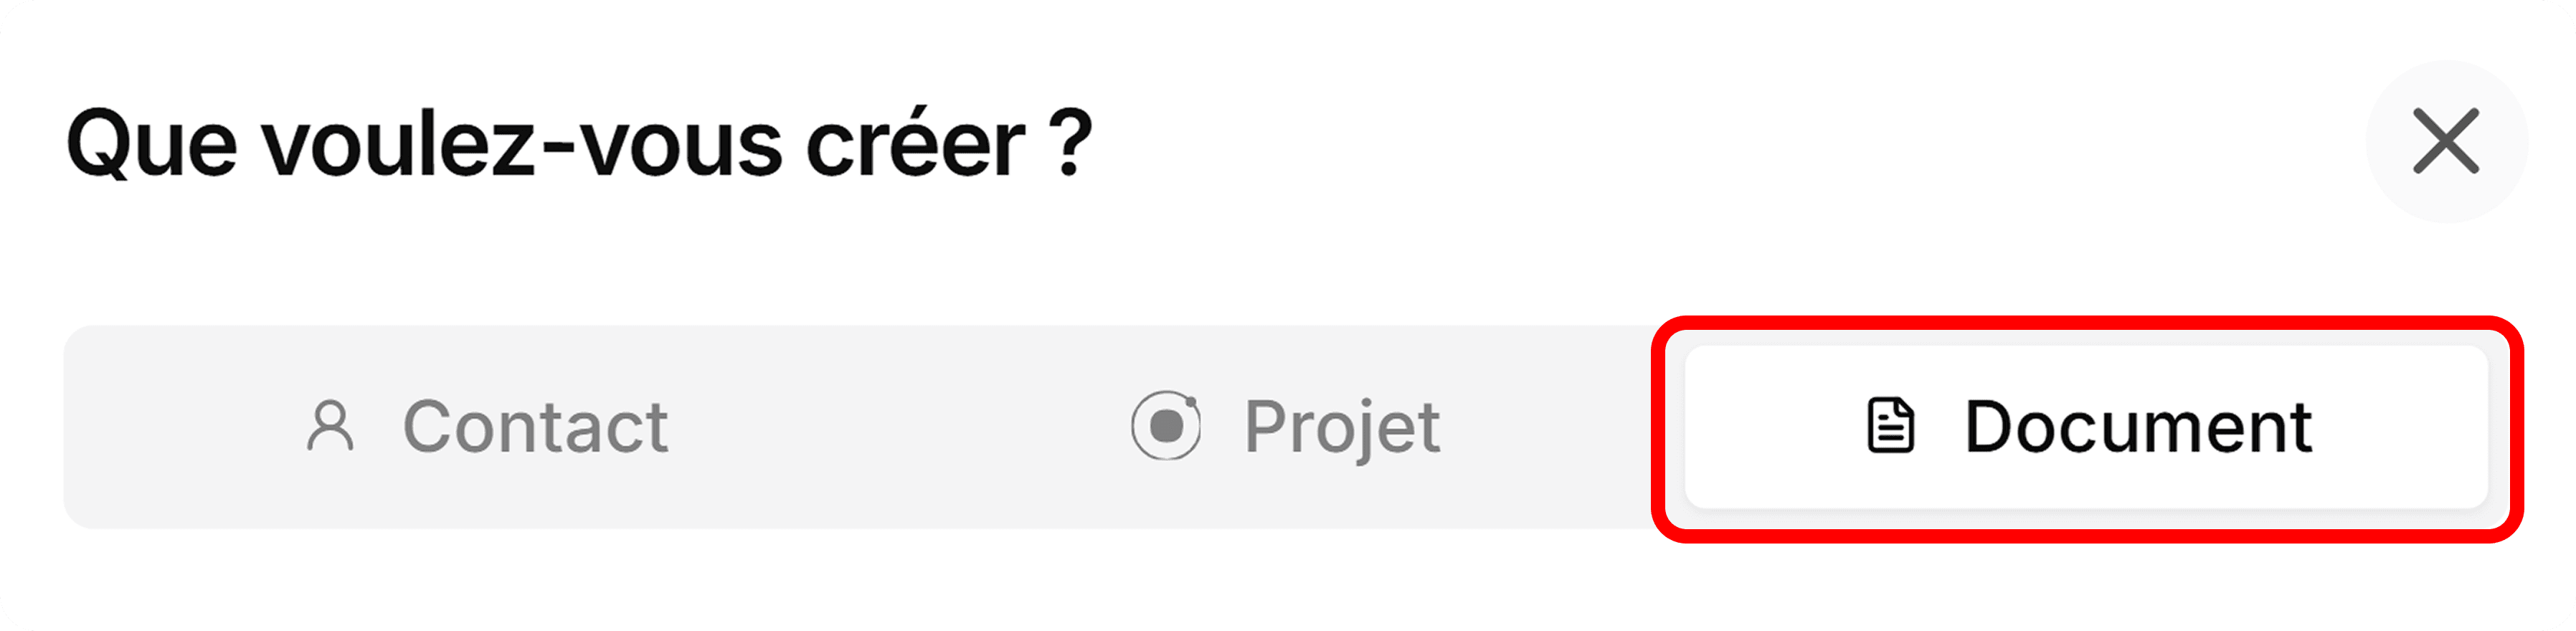
2A pop-up menu will appear with three options: Contact, Project, and Document. - Select Document.
Create from a Template
3- At the bottom of the creation screen, you will see the Create from Template option. - By default, the document name will be today’s date plus a default file name. You can change this to whatever you like.

Select or Create a Template
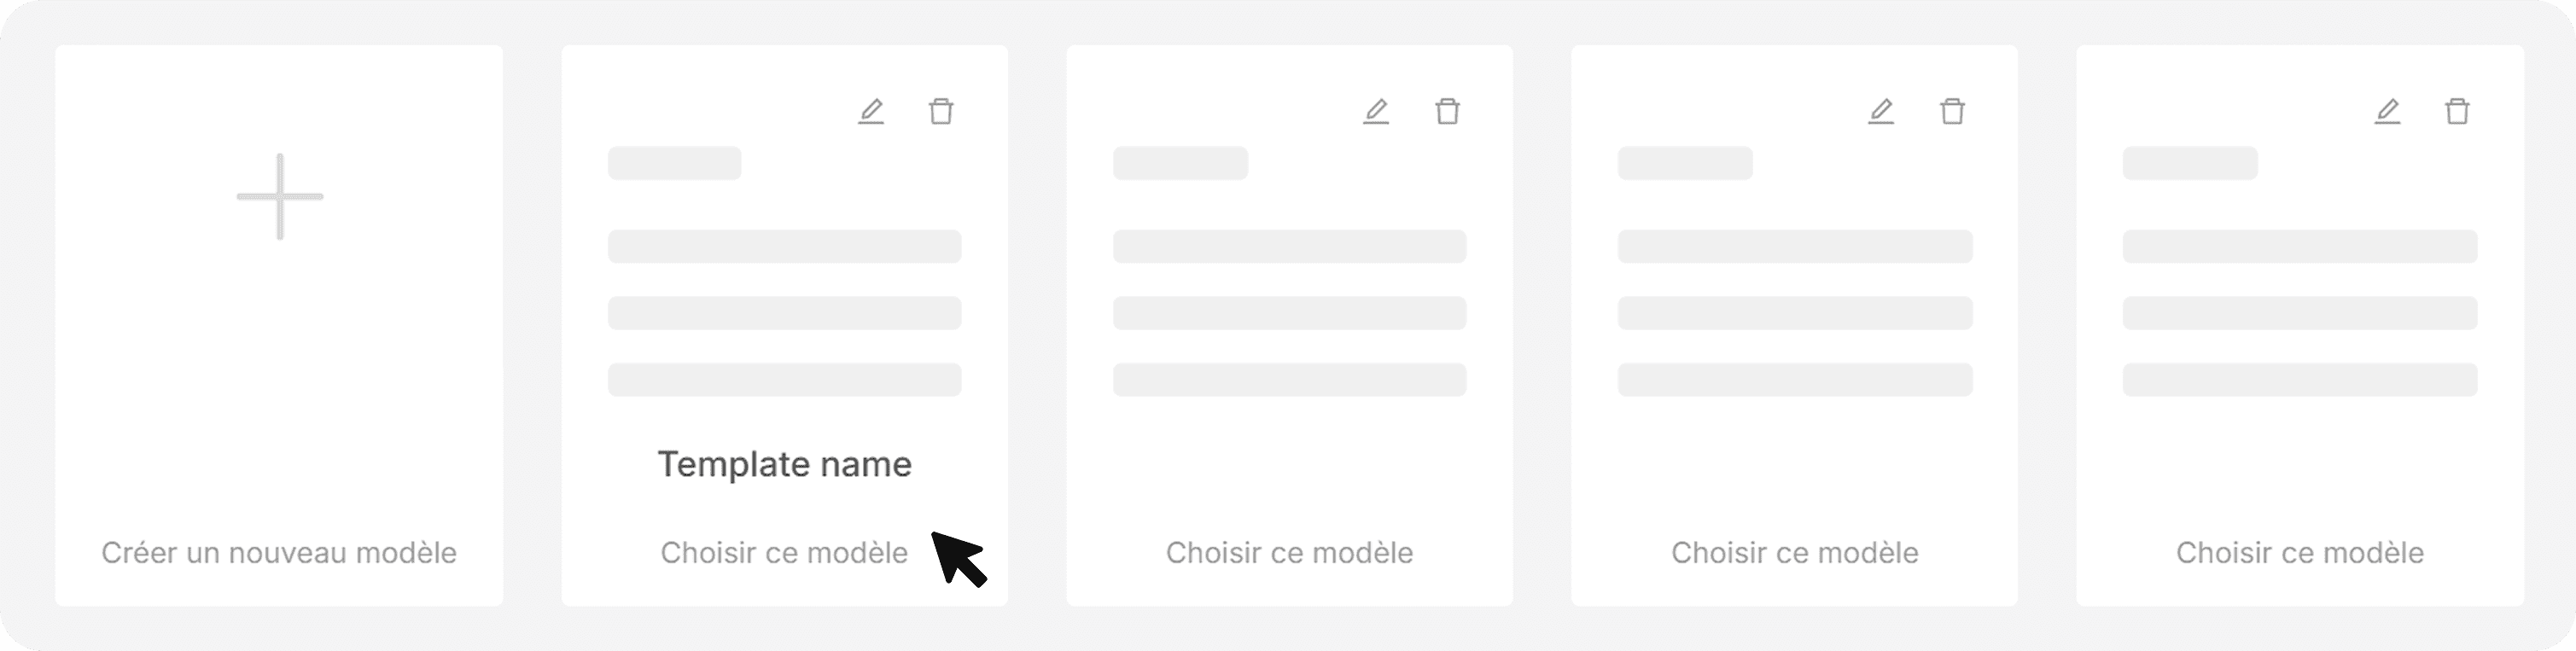
4- After clicking Create from Template, you can either: - Select an existing template from your library, or Create a new template. For example, you might choose a Billing template, such as “Monthly Billing Plans.”
View and Use Template Fields
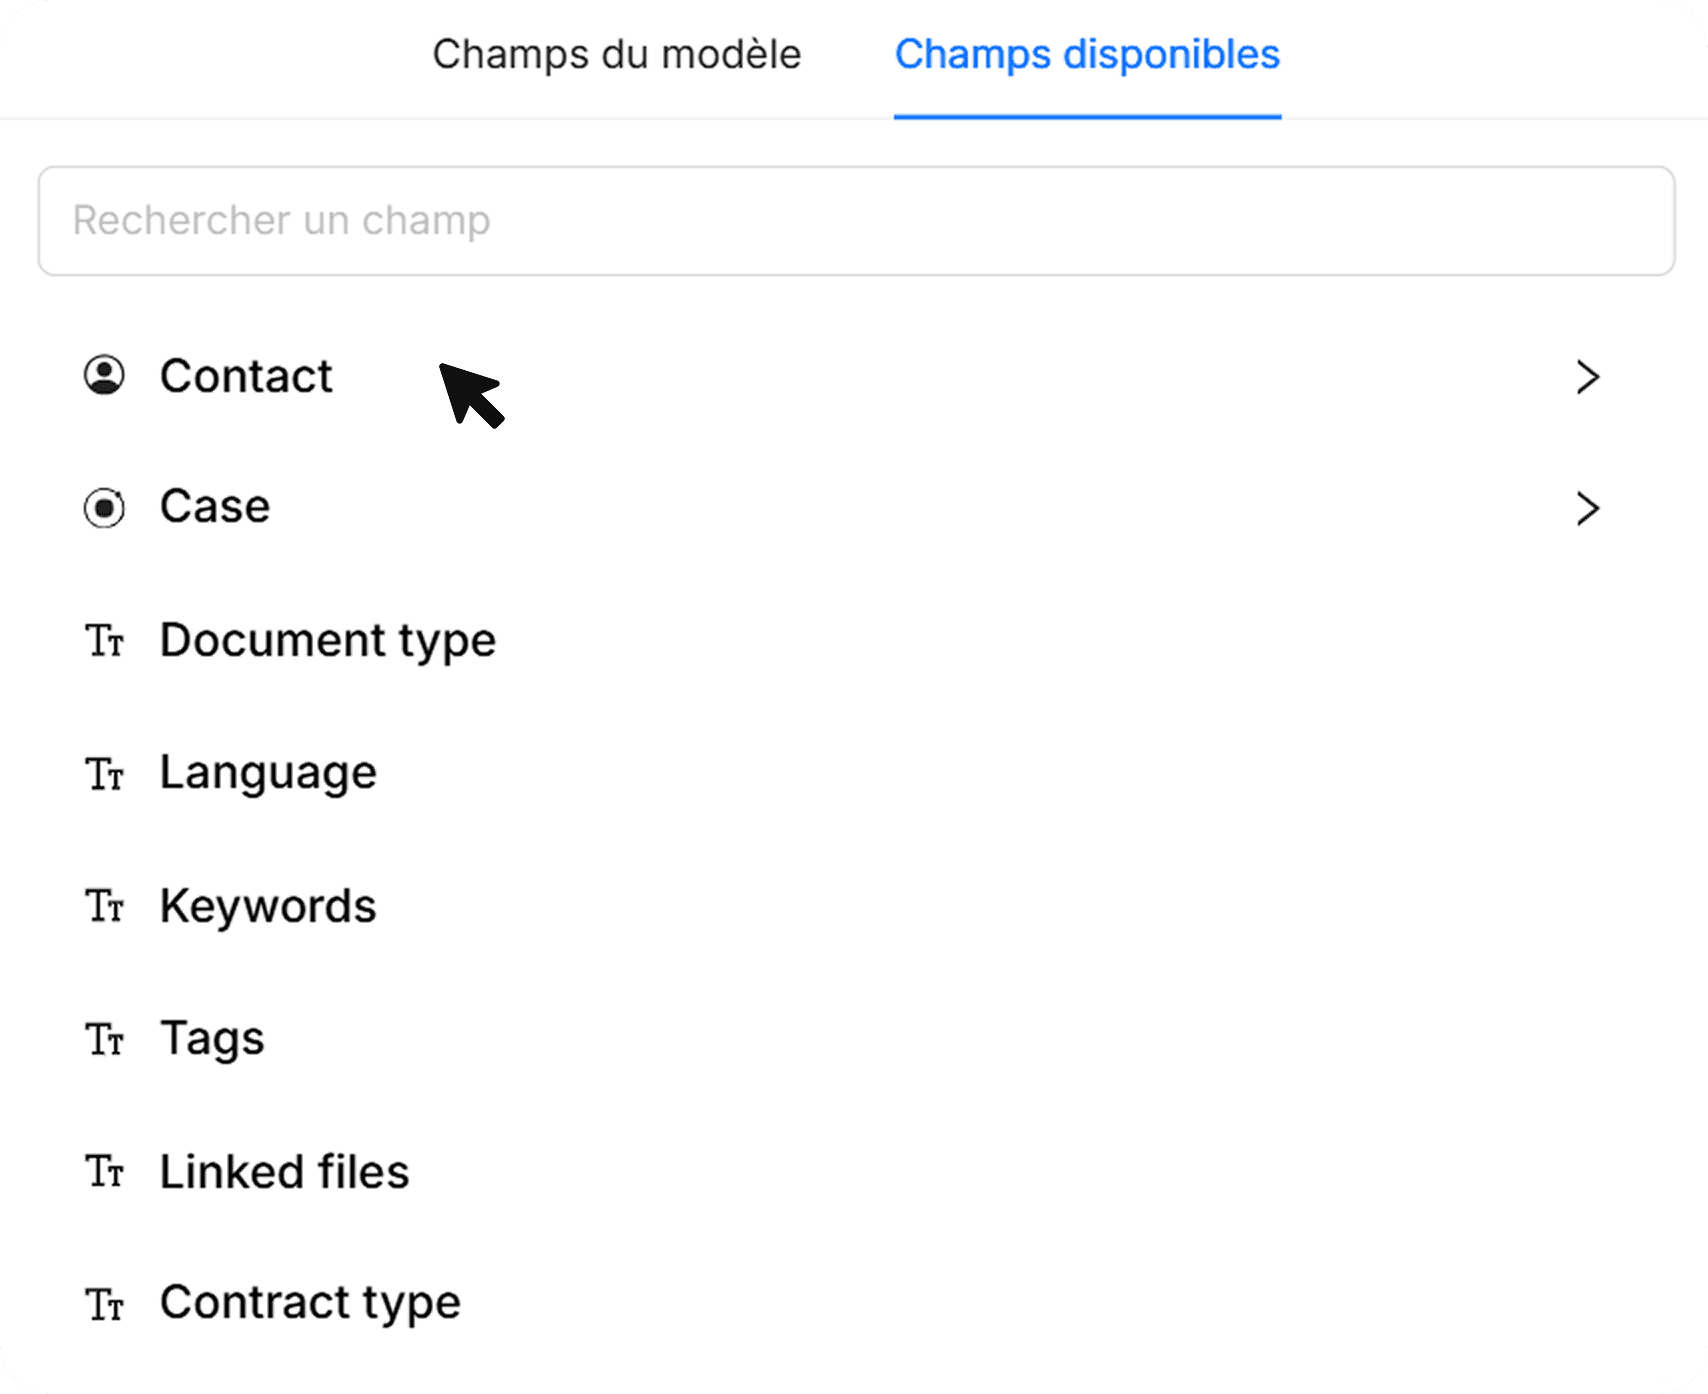
5On the right-hand side, you will see all the available fields that can be automatically filled from your client’s stored information. - Click on a field to see its details. You can add these fields to your document so Ketl knows which parts of the text should be replaced.
Optional: Upload Your Own Template File
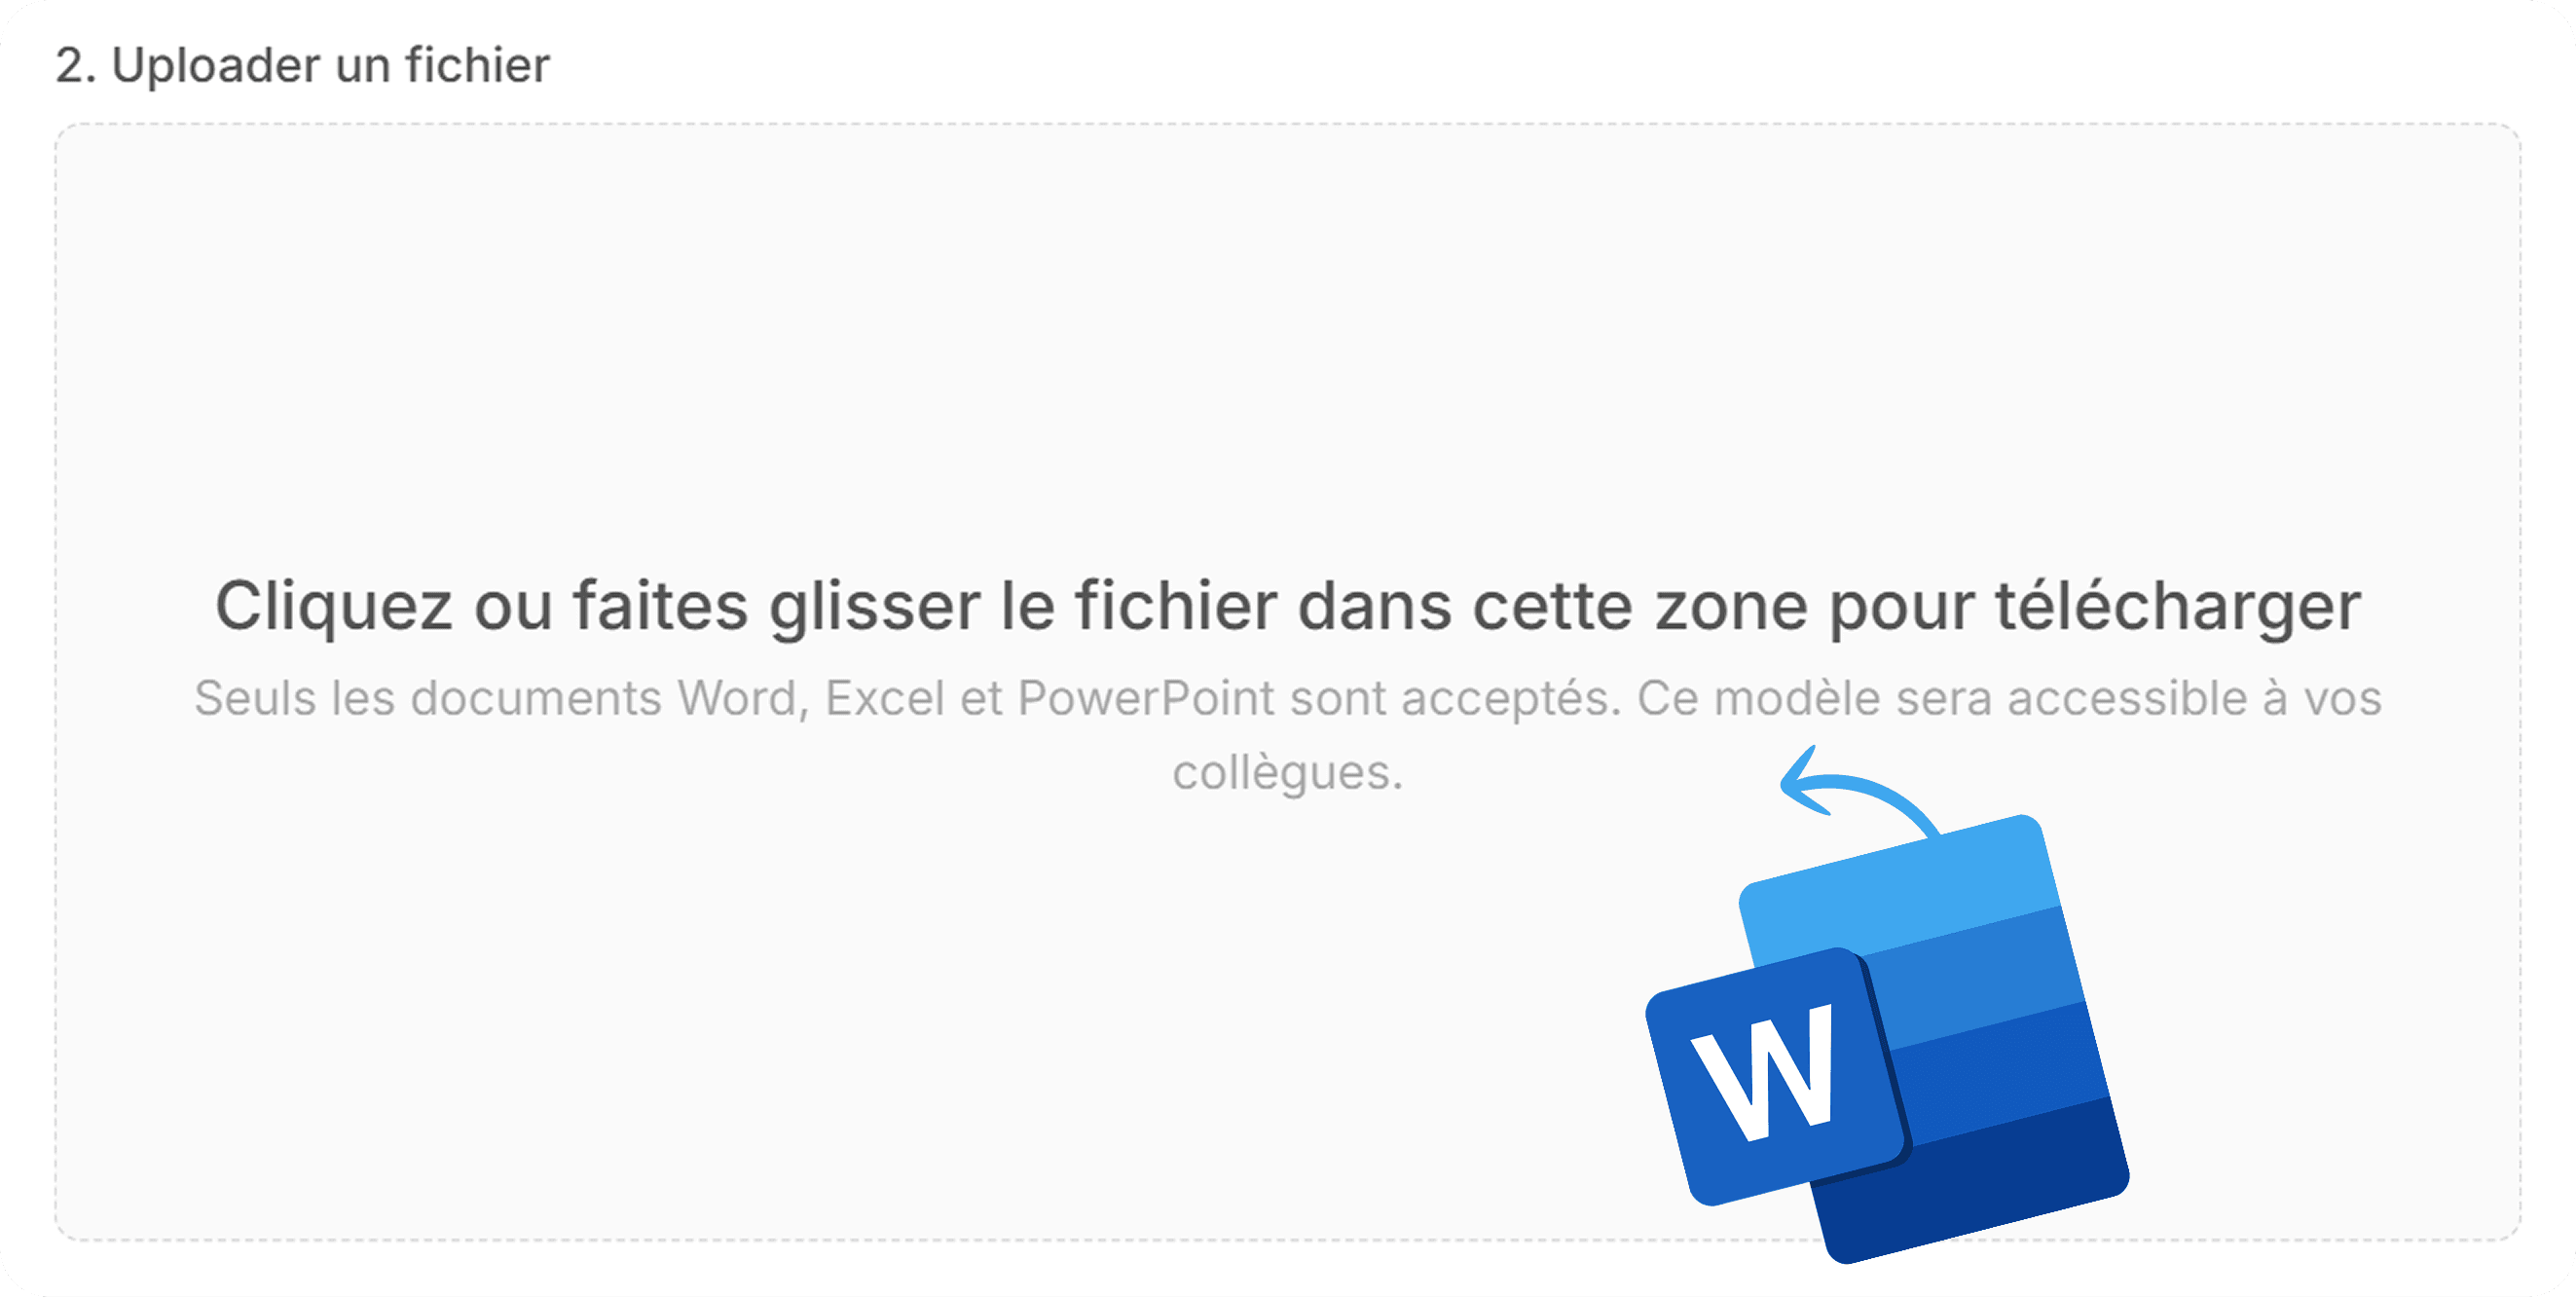
6- You can upload a file in the Upload File section. - If your uploaded file contains recognized template fields, Ketl will map them automatically.
Generate the Document
7- Select a template and proceed. - You will see fillable fields in the document where client data will be inserted. - Select the client for the document.Auto-fill and Review
8- Once the client is selected, Ketl will automatically fill in all mapped fields with that client’s information. - Review the document to ensure all details are correct.Finalize
9Save, share, or send the completed document for signature.
Keep your client information updated to ensure templates fill correctly every time.